Posts

The Santa Photo - Red Christmas Layout

Image
Well as you can see here is another layout I did of the annual Christmas Photo with Santa. This is from 2006. Here I used "Merry Christmas" and a Teddy Bear that I cut off a lovely christmas card I received. The papers all came in a bulk pack. The chipboard sticker (SANTA, I love Santa) is from the Kand Co range which I got on special. My journalling block is torn from a notebook. So on this layout I saved by using an embellishment and title off a Christmas card, using papers from a bulk pack and using notepaper for my journalling. The background page (white) came in an album as one of the pages for it. So I saved in alot of ways on this layout. I used the inking around the edges to tie everything together. I have been feeling better lately. The morning or should I say "all day" sickness has gone away at last! So I'm powering through some projects to get ready for when the baby comes and I'm too tired to scrap for a while!
It's A Girl - UltraSound Photos

Image
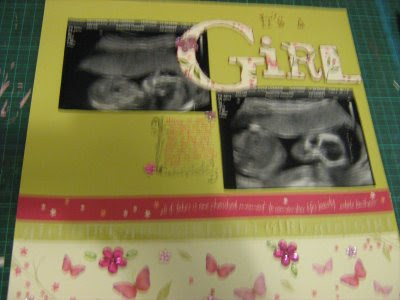
Here is the layout I did of my ultrasound photos obtained during the amnio. I used some bling from a butterfly I had decorating my daughters bedroom that had been squashed. This provided the leaves on the bling flowers. The chipboard letters were covered in the patterned paper but unfortunately the pattern was a little absent in this spot so I had to draw the pattern of flowers and leaves on with my pens.

Ho Ho Ho Merry Christmas

Image
"Every year we go to the local shopping centre to get our photo done with Santa. This year the photo was very pink so I made this layout use the very untraditional pink and yellow christmas layout. The title was made using the "Ho Ho Ho" from the Brenda Walters K&Co range. I got these in a clear out bin for $3.95 for the entire sheet. I did splash out on two pieces of patterned paper to tie together the theme of christmas and my unusual christmas pink and yellow colour scheme. I used papers from the Skyes the Limit Cherry Christmas range as well as a sheet of yellow star embossed cardstock with a lovely shimmer in it that my Sister-in-law bought at CostCo's. This was topped off by a piece of paper towel I wet and dropped coloured paint onto and then dried. This was the cheapest element on my page.. being practically free. The christmas tree was from a Bella Sheet and cost $2.50 for the sheet. To add extra interest and texture I dry embossed the corner of the card...

Quirky DD Photo Shoot with Pop

Image
This is a layout I just completed about my DD. She posed for this photo when she went to feed the ducks with Pop one day. I'm very lucky. Pop is an excellent photographer so I get some really excellent photos to scrapbook. Here I used papers from my stash and multiple photos (the small ones on the left are all sections of the large photo) to fill the space. The paper flower is from my K and Co Pad of flowers. For the photo corner I used off cuts of the background cardstock. Cut it to shape. Inked the edge lightly and then used kindy glitz (which I also used around each flower on the paper flower) and attached it with pop dots. The title was a large chipboard letter which I inked and an inkadoo stamp on the background cardstock. Which I then cut around and cut off the first letter and then applied to the layout with pop dots. The journalling was done straight on the page with a scrapbook suitable pen. I had lots of background paper available to make my title and p...

Amnio Preliminary Results are in!

Yeah! I have finally heard the preliminary results from my amnio. I got a call last night from a doctor at the hospital who went through the results with me and everything looks good! Also they tell me the baby is a girl. ..... So my DD is happy and DS is coming to terms with it...LOL! And I can finally go shopping for baby girl stuff and more importantly baby girl scrapbook stuff! My best wishes go out to anyone else out there waiting for news it can be a long and nerve racking wait. My best buddy says I should find a way to name this baby 5... This is because the probability of something being wrong was 1 in 6. And my buddy said that's o.k. there are five chances there is nothing wrong so we're going to concentrate on the 5. So that's what I've been trying to do or the last week.. So if you know of a way I could use five as a girl's name let me know!

PaperClip Embellishments - Make Your Own

Image
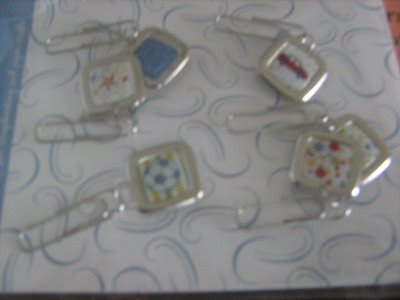
How cool are these little embellishments? My best scrapbuddy bought these on her shopping trip last week. I thought they are a great idea of how you can use up all the old charms etc that have accumulated.... in my stash anyway... this includes my jewellery making stash! I have some jump rings which I'll use to attach beads and charms onto the end of the paperclips to make my own embellishments. You could drop several decorations off the end of your paperclip rather than just one..... even make wire nick nacks and attach these with a paperclip. I also thought you could thread some little beads onto the paper clips to use up an excess of seed beads I might own! LOL! Seeing as how paperclips are so cheap this is a great way to use old items in a new way!

Bella Paper Padz - great economics

Image
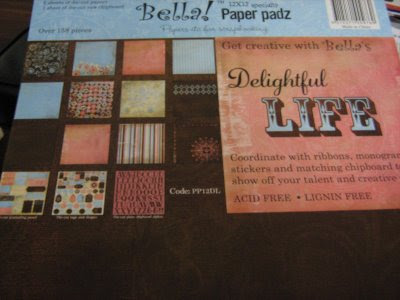
My best scrapbuddy went shopping without me....... :( And found this fabulous pack! I think Bella are one of the BEST value ranges on the market. This pack which consists of several co-ordinating papers, a sheet of cardstick stickers and a sheet of chipboard letters for only $5. This was a special at the "Reject China Shop". To get these sorts of great specials though you need to regularly browse all the cheaper and chipper shops. They don't tend to buy things regularly so you never know what you'll find... bit of a treasure hunt really. I love these sorts of co-ordinated kits but most of them are way too expensive! Now all I have to do is get out there to see what else they have... this was the last one... :( There was also a range of co-ordinating embellishments for $3.00