Posts

Showing posts from July, 2012

Our Family Organiser

Image
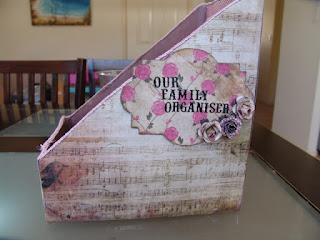
Here's another upcoming class at Arnolds. You are to pick the papers you'd like to use before the class. I created this as a good way to organise all that paper that the kids bring home. There's a note for this a permission slip for that... invitations etc etc etc. So now each person's paperwork is filled neatly away. You can add to this as much or as little as you like. For mine I added a pen holder, shopping list, important info pouch and diary all decorated to match. This is a very inexpensive idea using an old box and some patterned paper, paint and braiding. Below is another version I made for a friend and I added the pen holder and sticky tape dispenser and shopping list and post it notes pad.

Together Always

Image
Here's another page I threw together using the my memories software.  I wanted to see how easy it was to use with other kits. I do have some kits I've collected over the years (free ones of course) and wanted to see if it was easy to use this software to create a page. It did take me a while to figure out that I wanted to add shapes, then put a "photo" (actually the jpeg file) into the shape to get the different patterned papers on my background. But once I got the hand of this I was swinging along nicely. I love using digital scrapbooking when I'm making something for several people. For instance my girlfriend threw an awesome party for her 40th Birthday and alot of the girls I went to school with were there. On the night we had lots of awesome photos and rather than make up 7 different mini albums and take hours and hours to do that.... I made one simple digital album which I emailed to all the girls and they took to their photo labs and had printed. I a

Diva Template - My Memories Software

Image
O.K so I thought I'd try out some of the free templates and see how easy they were to use. These are two of my examples. I don't have alot of photos on this computer yet so was more limited by my photos than anything in the program. It was also 100% easier to make these pages than it was to find the album in my computer to load to my blog... new computer and I'm still trying to figure out where everything is LOL. I put these two pages together in less than 15minutes. You also have the option with the templates to change papers if you want. 

They Love Each Other

Image
So today I have a simple layout I put together digitally using a product I am trialing. The program I used is called My Memories Suite. I have used other digital products before so this wasn't anything new to me. That said I still think the simplicity of this program would be easy to use no matter what your experience level. I didn't bother reading any of the instructions I just jumped straight into using it. With the program you get a range of free papers and embellishments which means you can start working on a layout straight away. The thing I like was the papers and embellishments were easy to mix and match. Plus you can pick a textured paper and then change it's colour to any colour you like using the eye dropper facility. There are also alot of pre designed pages for you to use if you aren't sure how to design one for yourself digitally all you do is add your photos. The difference with this program when adding papers to your layout is to do them as &

August Class - Adore

Image
Here's is the canvas class I have designed for August. The class is called "Adore". In this class you'll learn how to embellish with ribbon, how to make your own flowers (of course) and team them with some of the gorgeous prima ones to great effect. You'll also learn how to create a quick and effective background using glimmermist.  I've also added some distressing techniques and a great way to use some of your stencils to achieve a raised 3D effect. Here I used one patterned paper as my frame and clustered my embellishments in the bottom right hand corner of the photo. I really love the prima bird and "adore" branch. If you're coming to this class you'll need scissors and double sided tape and a wet glue (helmar 420 is my favourite for making flowers)an embossing tool and mat and a distressing tool if you have one. Call Arnolds to book in on:   07 3293 4390

Flower Making Class

Image
Here's a class I'll be teaching at Arnolds. I love making flowers and I think these are particularly gorgeous.  So call Arnolds and ask to book into this class if you're interested in learning how to make these.  PH: 32934390

Ingvild Bolme Giveway

Image
http://www.ingvildbolme.com/ Well guys as you know I love a freebie and whenever I hear of one I like to share it with you to give you a chance to win it too! And this one is HUGE! I'm also a big fan of Ingvild Bolme; her designs for Bo Bunny are fantastic and her tools are a definite must have on my list of tools.... only thing I wish is that they came in pink as my whole craft space is pink and brown.... but I'd take a beautifully designed, easy to use tool over a pink one any day! Now Ingvild is having a giveaway to celebrate the new design of her blog so head on over to her blog and check out the giveaway. The new site design is beautiful and looks "so her"!  Many of her layouts are there for you to see too! So maybe you'll get some ideas while you're there.

More Stampin up circus theme cards.

Image
Well after the show and the great class I attended I thought I should have a go at a few cards using the fabulous stamps from stampin up we got in our class pack.

Adored 2011

Image
Here's a layout I did on artist professional canvas. I misted and stamped the background and then used patterned paper offcuts to make the embellishments and title. I saved on this layout by using off cuts from other projects and by making all the embellishments myself. A few pearls from an old necklace were added for good measure.  I love this photo of the kids and wanted to try out the tim holz flower die which I borrowed so luckily I had just enough of the newsprint paper to cut them.

Wedding Ideas

I am so excited. I have been asked to be a bridesmaid for a girlfriend of mine and will be helping organise and decorate everything. I love weddings. My vow renewal was low budget and low key but this is going to be low budget and va va va VOOM!  So any great ideas anyone has for ways to make decorations for the ceremony and/or reception please email them to: cheapscrapbookingideas@yahoo.com   Thank you!  I will be posting my creations to give ideas to everyone else.

Growing up too fast

Image
Here's a layout I did using two pieces of patterned paper and some off cuts. I used one piece of paper as my backdrop and then fussy cut elements of the page and using pop dots adhered them over the same image. In some cases I added another layer by cutting the smallest element from the back piece, adding my next layer and then finally the tiniest piece on top. I also stitched the banner onto the page using my "Sew Easy" tool and then used stickers for my title. It's a very simple design but then I didn't want to do my usual style here as I didn't want to lose the background picture. I added a waterfall element to the page so I could use a few photos on the layout without losing the picture on the background. (PS sorry about the shadow..... it's the lense of the camera... I was in such a hurry). I love the idea of these waterfall display's as you just pull down on the bottom and each photo flips over to reveal the one underneath.

Why do you scrapbook?

My blog is my place to share my ideas and tips on scrapbooking.  I love sharing my creations and hopefully inspiring others to keep their memories too!  I often think about why I started scrapbooking and always try to remain true to that...... Do you remember why you started?  I had a friend who was a creative memories consultant who had been trying to get me involved for years! She kept saying you should try this you'll love it!  And I kept resisting. I had enough hobbies..... I loved renovating furniture and cooking, stamping, calligraphy, watercolour pencil and pastel art and folk art and mosaics and I really didn't need another hobby. Then my mother died...................... I can't put down enough words to explain how this felt. At the time this was all exacerbated by my husband's mother's death 5 weeks earlier and the birth of our second child. The failure of our business, that just couldn't cope with the constant cancellations her illness required

Noticeboard and Post-it notes

Image
Hi Everyone, Here's a relatively cheap gift idea. I took an ordinary corkboard, painted the frame and cork in two different shades of the same mustard colour. I then stamped around the frame with black ink. I also stamped on the cork and then embellished with cut outs. The post-it-note pad is a piece of chipboard that I decorated with paint and other embellishments. I then applied ribbon to hang these by. You could use any colourscheme you like. I used this one as it perfectly matches my girlfriend's kitchen.

Angela Daniels is on CRAFT WARS!

The ubber talented Angela Daniels and Patty Duffner are contestants on Craft Wars:  http://www.youtube.com/watch?feature=endscreen&NR=1&v=h_BfYl59fZM I've been a big fan of Angela's in all her endeavours but I think this will be my favourite. Check it out! It's a reality show about crafting! OMG OMG OMG!