Posts

Showing posts from November, 2008

Using up your scraps layout: Higher Lower

Image
Here's a layout I completed to use up some of my scrap pieces of paper. I keep all my left over pieces of paper in a folder and usually use those scraps for card making and craft activities for the kids. This time I thought I'd use some for another layout and this was the outcome. I've also used my Labeller for the words as it was so quick..... Before a debate begins raging and you all go purist on me: No I don't think these are acid or lignin free. AND I'm not really concerned as none of them touch my photos. PLUS all the photos are stored digitally for easy reprinting. Anyway I used chipboad Letters for my main title monograms and then used my fiskars cutter and template to make the butterfly. Fancy sissors were used to cut the patterned paper into strips to add next to the ribbon and then my creative memories punch to cut out the fancy squares which I used as photo corners. The journalling was done on a piece of paper I stamped with a stamp I purchased for ...

Teddy Bear Ballerina Paintings

Image
Since I've been sharing the decorating of the nursery with you I thought I should share these cute paintings my DH did to continue the theme. I'm so lucky! I described what I wanted and he just sat down and painted it! How cool is that!

Free Scrapbooking Magazines

I know very early on in my blogging adventure I advised you all about the benefits of checking out your local library as mine allows you to borrow scrapbook magazines to browse through..... Well I've discovered an even better way to get my fill of ideas and such without having to go to the store and buy the magazines.... Get them delivered digitally. I get creative paper delivered to my email inbox totally FREE...... Check them out at: www.creativepaper.com.au

A great site for Free digi designs

I found this great site with some fabulous free digital designs for those of you like me who are dabbling in both digital and paper scrapbooking. Check out: http://creativedelusionzscraps.blogspot.com

BTP- table for the nursery.

Image
This is a really big Beyond the Page project...... Have you ever wondered what to do with those tacky freestanding ash trays from the 60's and 70's? Well...... I needed a small table next to my rocking chair to hold my water bottle and a snack while I'm feeding baby and a place to put the phone so I don't have to get up in the middle of a feed..... But trying to find something that would fit in this tight space was a challenge.... Then I saw this ash tray at a second hand store for $7.50... So I bought it home polished it up.... took off the ashtray part and then added the top (which is actually a cutting board which I've painted and stenciled to match the room. And there you have it for under $20 one side table..... Utilising my scrapbooking stencils and paints also saved me heaps! And if you notice I've used the same stencil on the table top as I have on the drawers in the cupboard I did up.

Christmas Planning Book

Image
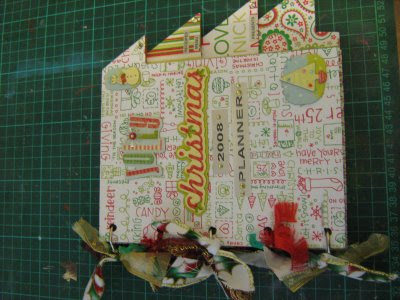
I made this Kaiser Album to use to help me organise everything I need to for Christmas. I've got lists everywhere at the moment. Baby lists (to buy, to do, hospital and birthing lists etc etc) So I decided I needed to keep my Christmas stuff separate so this book divides into sections for my menu for Christmas Day and the shopping lists for that and my Christmas Presents lists and my baking and christmas cards... I have used all items from my stash here and the papers were a free gift in a magazine I purchased last year (the left overs) So it's actually turned out to be rather economical and added to that next year all I have to do is get my dynamo labeller and type 2009 and stick that over my 2008 and I'm in business to organise another festive year!

Alma Park Zoo Mini album

Image
I created this mini album of all the animals the kids saw when they went to the zoo. The album is 15cm x 15cm so I got four pages out of one piece of cardstock. To be really quick I inked all the chipboard rather than painting or covering in paper as I had an afternoon to myself and really wanted to get this completed. The papers I used I got from K-Mart in a pack and they're all animal prints (peacock feather, snake skin, giraffe, zeebra etc) This kit was really cheap (under $6). All the items used came from my stash so there was no new spending to complete this project..... but I've estimated the whole album cost around $10.00.

The ballerina Teddy I created

Image
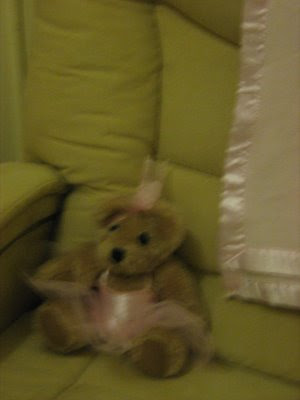
Here's the final piece I've done for the baby's room... I took this really cute teddy that DD wasn't using anymore and created this tutu for her (P.S. don't look at the sewing on the back..... LOL my sewing looks awful!) But I thought this would be a nice element to place on my rocking chair to complete the theme.

beyond the page projects for the nursery.

Image
Beyond the Page Projects are alot of fun and let you bring your passion for scrapbooking out of your albums and into your home. I love the "original" feel they give to your decorating. I don't have alot to spend on decorating my home so I enjoy altering old items to save money. Here are the projects I have completed for the nursery. First is this adorable Kaiser "BABY" sign which I did using the same elements I've used on the mini canvases (for the baby's name). I had a few Kaiser Teddy Bears so I kept one aside to make the "sleeping" sign" Then I used the remaining two Kaiser Teddy Bears decorated them the same and attached to the front of the Lowboy I purchased (and spent ages painting!) You can see from these photo's that not only did I paint the outside but also the inside..... that was my cunning plan so I could add these cute teddy bears on each shelf. Using a simple stencil I purchased from Crazy Clarks. Now I know I've show...

Off the Page Projects for around the home - Living Area

Image
Here are some photo's of the off the page projects I recently completed for around my home. These items are all in my living area. For those who have been reading me for a while you'll remember the artworks I completed for this area to match the cushion and the colour scheme is bronze,black, silver, white. This first item is a paper towel holder which I painted silver and then created a bronze topper for it using a piece of chipboard I decorated. Next is this folder "Family Organizer". I got so sick of all the pieces of paper I had to hang onto for each member of the family like the dancing newsletter for my daughter outlining the concert information etc etc etc.... so I created this folder with a section for everyone... Now every piece of paper has a place be that bin or organiser or bills folder. I then altered a letter holder to make it match my colour scheme this was a simple case of painting it with acrylic paint and then adding the chipboard element (gotta love ...