Posts

Showing posts from 2007

How to make my receipe book.

I was just catching up on some of my Craft TV Weekly viewing and I discovered a great tutorial that basically shows you how to make little books like the receipe book I created for christmas presents. They've tittled it "Pocket Book" but it is basically the same concept as my receipe book.... just with more pages instead of envelopes..... Anyway if you're interested you can view it here: http://www.crafttvweekly.com/player.html?wid=127

Happy New Year!

Hi everyone, sorry I didn't wish you all a Merry Christmas... I meant to ..... but i got distracted preparing for christmas. So I hope you all had a lovely christmas. Santa was very generous to me this year. My scrapbooking collection has been expanded..... With a caddy full of stamping inks and a very large collection of brush tip pens and another caddy full of stamps..... WOW! I also got the best present ever! Pop took some fabulous photos of the kids which he had put onto canvas for me for my christmas present. They look so GOOD! I'll take a photo soon and put it up to show you all. I hope you all found something you wanted under the tree. We have two birthday parties to attend before New Years so I may be a little tardy with my next post. Hope you all have a wonderful New Years and the coming year is a Happy/Healthy and Prosperous one for you all!

My Off The Page Project - Cubby House

Image
My Latest Off the Page Project is...... A Cubby House! Here is "Rose Cottage". Complete with carport for DS's little jeep... This cubby house took my father-in-law and DH a weekend to build. We were lucky enough to get our materials for free (only spent $80 on the roof, and some wood for the frame, hinges, door handle, letterbox, window box and one of the pailings in the verandah and the lino flooring.) as our neighbours were renovating their house. This shot is from the front showing the planter box and letterbox off to their best advantage. On the door I stencilled some roses in the corners of the door and then I stamped "welcome" on this little oval plate then I stuck down some blue roses. (for regular readers you'll notice they're the same type of rose as the ones I used on my DD's wardrobe) These roses were stencilled on the outside of the cottage. This letterbox was added as my kids love to get the mail out of the letterbox and pretend t

Coffee Mugs are Finished

Image
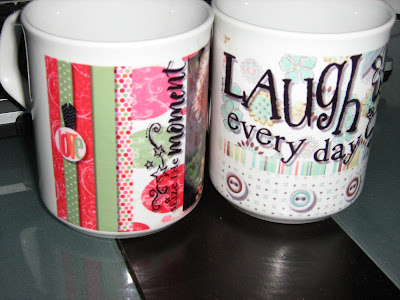
Here are the digi scrapped coffee mugs I told you about a few posts back. They're back from the "printer". These were really easy to do. I first created my document that I was digi scrapping and I made the size of the document 4" x 6'" (a standard photo). I then decorated that page using my digital scrapbooking papers and embellishments and finally added the photos. I then went to my local photo lab and uploaded these images to their software and chose to have them printed on mugs. (I chose the stretch option which stretches the image around the mug. So then I had to resize the image to get all my decorations on the mug). And here they are! It only took them a week to print them! So if you're thinking of doing this for a christmas present I think you may just get it back in time...... but check with your photo lab to make sure they could get it back to you before Christmas. I'm happy with the result..... hope the recipients will be too?

Christmas Present - Calendar, Address Book, Receipe Book Blue, Green and Orange

Image
Here is another present I made. I made another gift set for someone consisting of calendar, receipe book, notebook and address book. These are the same as the pink and brown one I made but in a different colour scheme. Again though I only used the 4 x 6 blocks of patterned paper. And only one piece of each patterned paper was required to complete this project.

Make Your Own Cards as Gifts

Image
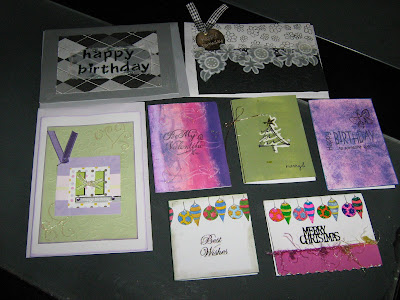
I have been very busy churning out the christmas gifts. This latest gift was very labour intensive..... I have filled a box received from a present with hand made cards. I will then give this box full of cards to someone as a present so they will always have a card for any occaision throughout the year. The best thing about this was I got to use up lots of my scraps. Here are some of the cards I made:

Make your Own Gift Boxes

Image
I attended a stampin up party recently where we were shown how to make these boxes. Simply take a piece of cardstock and fold it in half and crease the fold. Unfold then fold in half in the other direction mark the centre on each outer edge but do not crease these folds. Now fold into that centre point so you have folded over each corner. Now fold the creased centre line back up and the folded over corners will form the sides. Punch two holes in each side and thread ribbon through here and tie off to hold together. I stamped a pattern on the cardstock using my autumn leaves stamps and then stamped the same pattern on black tissue paper. I did one set in gold and one in silver and filled these with chocolates for a great gift idea.

Paper Clay Christmas Decorations

Image
I love to give presents I've made myself and this year is no different. Here's one present I made for my girlfriend which she seemed to like alot. It's hand made christmas tree ornaments. These decorations were made using my paper clay receipe. I used chocolate moulds to create the shapes and then purchased the wire hangers and attached the painted paper clay decorations to the wire hangers and added the beading to make them more interesting.he The green star has been created using opals embossing powders. I melted the powders and then used a cookie cutter to create the shape. When the liquid cooled I separated out the shape.

Christmas Pool Parties

I've been so hectic lately. Sorry guys I haven't posted for ages. I have been very busy though! I have made two more sets of the calendar/address book and notebook sets and I've made a bracelet, some body scrub and some christmas decorations. Photos will be supplied as soon as I get a chance. I've also been busy with all the preparations for my birthday and my DS's birthday and social events. There are two parties that we love going to every year! The first was held yesterday. This is a girls only event! One of my girlfriends' hosts this event and it is WONDERFUL! We sit around her pool and talk and catch up and eat delicious food and get a massage! We had the BEST time! Then the other annual christmas event we love attending is on today. We have friends who live across the road from the beach. Every year they have an all day pool party. (For those of you who don't know I live in Redcliffe, QLD, Australia.... our Christmas time is the hottest time of the yea

Pink and Brown Christmas Present - Calendar, Address Book, Receipe Book

Image
Well I have been a busy little bee whilst not online and posting. I have been making Christmas Presents. I love this time of year. It's hard work and by Christmas Day I really deserve my day of rest! But no matter how tired I am I still manage to cram some more into it... So here is an example of one gift I have made. There's a Calendar/Note board, a receipe book and address book. I used a pink and brown theme for this project so all the items will co-ordinate. I actually used this colour scheme for my album of my childhood so you know it's a favourite. The Calendar/Note board is two sided. This is the noteboard side. (see the bulldog clip for storing notes or memo's) This is the calendar side. (It's a two year calendar which I purchased for $1.... easier than making it) The whole thing is done as a sandwich board so you can easily close it up to get it out of the way if you need the space. Here's my receipe book: I only divided it into two sections Savoury

Digi Scrap a Coffee Cup

Image
Well as I said last night was a commencement of the Christmas Present making that I do....... a late night was endured and I'm no where near finished enough to show you any photos yet..... but I did design a coffee mug... You know how the photo labs alllow you to put a photo on a coffee cup? Well I decided to take that a step further and put a layout on a coffee mug. Here are the two cups I've done.... am waiting for them to be "processed".. but I love the idea! In fact I love these so much I think I'll have to get some for us too! I'm back to my work space to continue on the production line so hopefully I'll have something to show you tomorrow.

ShowTime

Image
It's often hard to pick a colour scheme when you're dealing with multiple photos. In this case I used my largest photo as the indicator for my colour scheme. I loved this day at the show as it was the first time my DD was brave enough to ride the pony...... Now she loves horses and wants one just like I did. Unfortunately all the land where I kept my horse as a kid has been developed into housing estates now so I don't think I'll be able to get her a pony........ It's a shame but there really isn't any good adjistment land anywhere close by anymore. My DS has always loved animals (just like his mummy) and he would be ecstatic if we got a horse. He loved the pony ride! Our local show is very small by anyones standard but it's perfect for little kids. It's held every year during the winter holidays (hence the warm hat on DD hiding her curls). I took this layout and many of the ones I've shown you recently to my local photo printing lab to get a photo

remember this... CHEESE!

Image
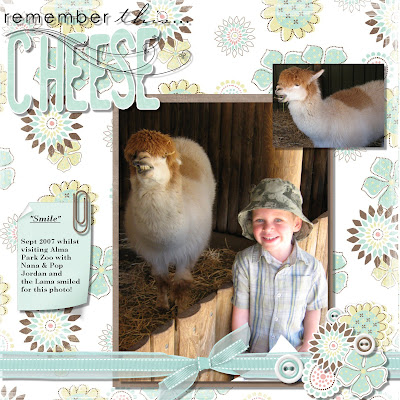
I had to share this layout with y'all..... I love this! It was a 1 in a million shot. We went to the zoo as a family and my husband said to my son "Say CHEESE". So my son looked at the camera and smiled. When my husband looked at the shot on the camera he thought it was really funny that the Lama also smiled for our photo. These are the sorts of moments I love to journal about most. Those spontaneously funny moments that just come out of the blue! I also love this colour combination. I'd love to redo my loungeroom in these shades but my DH isn't keen...... I'll work on him... Though I guess I can see his point. I do get attached to colour combinations for a while then I move on to my next favourite combination....... oh well there's always scrapbooking to let me explore my favourite colours.

Make a Wish

Image
Here is another one of those three second layouts! I used a free digi kit and just added a few touches of my own. The elements on the photo were added in Adobe Photoshop. The rest of the layout was achieved using Scrapbook Max. I'm planning on printing a synopsis of the year in digital layouts and then my paper scrapbooks will have everything else. So here is one of the layouts I have done of my daughter's 3rd birthday party. And here is another:

Rabbits Rabbits Everywhere

Image
I did this layout early last year and haven't had a chance to share with you the cost saving ideas I used here. I stamped my title with paint directly onto the page, this saved alot on my title. Next I used a little paper rabbit I purchased for .50c at a show. I then used it as a template to punch out this little grey one. I added a ribbon to the page that came wrapped around a present I received and I used a piece of patterned paper that I got in a bulk packet. And the little rabbit charm came in a packet of six for $3.00. So even though I used alot of embellishments I haven't spent a great deal of money on this page. I loved these photos of my DS when he was a baby and dressed in these cute little bunny pjamas. For some reason at this stage he was mad for rabbits. Every night we had to read all 12 books that we had with rabbits in them. His toothbrush had a rabbit on it and his favourite television show was "Max and Ruby".... you guessed it rabbits!

From Party, to room decore to scrapbook supply.

Image
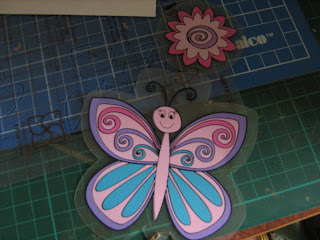
I love to get alot of uses out of one purchase and this is a perfect example of how I do that. This butterfly is one of many strung together. The whole strand cost me $1.69 and was one of a couple I purchased to decorate out yard for my daughter's birthday part.... It was a butterfly party... anyway at the end of the party I took them down and have used them to decorate my daughters bedroom. Recently one of the butterfly's and one of the flowers fell off so I've confisgated them as scrapbooking supplies! Now I just need to find the photos of that party and we're good to start scrapping!

My new Tool

Image
I always say I love to spend my budget on tools first. I was browsing in a store the other day and saw this punch on sale for $2.50. What a bargain! I thought it would be really good for titles as each letter of the title could be placed on each little tag. So todays tip is to keep your eyes open for specials! Always be browsing and thinking outside the box a bit, as you may find a wonderful supply or storage device in another part of the store other than the scrapbook section.

LOVE Layout

Image
Here's my latest paper scrapped project. I made the word love and used a heart as the "O". I first inked these chipboard letters with my ink pads. The letters then had dimensional magic added and the heart was covered in glitter before being covered in dimensional magic. (I always paint or ink a chipboard piece before glittering as this cuts down on the amount of glitter I need to use.) The circles were cut from beautiful patterned papers I got off my sister-in-law who aquired them from cost-co. They worked out to be 33c a sheet and I have used less than a quater of each sheet. The rub-on was off a sheet from "Me and My Big ideas" which I got at K-Mart for under $5.00. The saying: The moment a child is born, the mother is also born. She never existed before. The woman existed the mother, never. a mother is something abolutely new. -Rajneesh- I love that saying! I used my computer to write this saying on a clear label we used at my last workplace. So it did

How to use Bark on a Layout

Image
O.K. so here is an example of a layout I did previously using bark. This layout has been posted before but I thought for anyone who hasn't been with me since the beginning you wouldn't of seen this idea and therefore my last post might of seemed a little odd.... LOL So here you can see I've used Bark, gumnuts and paperclay to embellish my layout very cheaply. I do practice what I preach! For those of you who have watched my videos on the "no bake clay" here is an example of me using this on one of my layouts. I pushed the clay into a mould my best scrapbuddy owns and let it dry overnight before adhering it to little squares of paper.

Beautiful Bark

Image
Speaking of Free Supplies I found this beautiful piece of bark at my local shopping centre car park. The paper bark trees often shed thin sheets of bark like this. The aboriginees used these pieces of bark for many uses such as cooking and clothing and bags and buriel shrouds etc. I've also seen them used for artwork and as paper for messages. I've now just got to take the kids bush for some photos' to match.... lol