Posts

Showing posts from January, 2008

Daddy layout

Image
Get Your 500 Scrapbooking Sketches Now... Click here! Here's another layout I completed when I had the house to myself Sunday night. I used 4.5 x 6.5 patterned papers from the "Glitter Cardstock Matstack" (48 sheets for $8.95) and "The Glitter Mat Stack" (60 Sheets for $8.95) and one sheet of 12 x 12 cardstock. I used free chipboard to cut out the letters and a Bella Chips swirl in the bottom right hand corner. The ribbons are left overs from my christmas projects. This layout shows some digital techniques. I used the "oil painting' feature to create this effect and then wrote the quote over the photo. The quote reads: All kids need is a little help, a little hope and somebody who believes in them. Earvin Magic Johnson I have added another quote: Any man can be a father. It takes someone special to be a dad. -author unknown- To save paper I laid each piece down and then traced around them with a pencil. I then cut out the paper you wouldn't see

My Love

Image
Last night I had the house to myself for a couple of hours so I was able to do some scrapbooking! YEAH! The kids go back to school tomorrow so I should be back into the swing of it soon! Anyway this layout was alot of fun to do. I got the cardstock on special for $0.50c and the letters were a set that I got at the $2 Shop... mind you the box was $3.95..... so not $2 at all..... Anyway I really wanted a glittery paper for this layout and as I didn't have one and couldn't go to a scrapbook shop at 7pm I got the Kindy Glitz out and created my own! This is very easy to do. In a couple of the above photos you can see the effect I created as the paper is only half done with kindy glitz when I took the photo. Try this for your own effects. You can't get this wrong. Just turn your kindy glitz bottle upside down and let all of the liquid run to the top. Then get a pin and pierce the top. On a scratch piece of paper try out the product to ensure you've got an even flow t

DD loves her room!

Image
Thanks to everyone who left comments about my Darling Daughter's Disney Bedroom! Here;s a photo of her to show how pleased she was and still is ...... so yes .... it was worth it...... even the plastic in the heat Deb! .... lol .... thanks everyone for reading my blog and leaving me comments.

Scrapbook a Candle!

Image
Here's a great gift idea I forgot to share with you at Christmas. I went to a Stamp-In-Up Party a few months ago and the demonstrator shared with us this nifty idea. Stamp an image on a piece of tissue paper. Then cut out the image. Don't go too close to the edges. Then get a piece of baking paper and wrap it around the image and around the candle and extend it past the object to give yourself something to hold onto. Hold the two ends of the paper in one hand. Then turn on your heat gun and lightly wave it over your stamped image. You want to do this in little spurts as you're trying to melt a little of the wax to hold the image in place but you don't want to distort the shape of your candle. When that's complete you can add extra details like I did here with the ribbon and a split pit to hold it. I made these three candles to go with a calendar, receipe book, notebook present I made for someone.

Off the Page Project - My Living Room

Image
O.K. so I know this sounds crazy but it actually worked out rather well. There are two main scrapbooked pieces the first is this collection of four canvases. I needed some artwork to set off my new cushions. So as I couldn't find anything to do the job I decided to create them myself. By the end of my little adventure I had a whole new room for $89.00. I do take my miserly ways to all other areas of my life not just my scrapbooking. The thing I love most about this room is I created it all myself. It's definitely MY living room! These four canvases cost $2.95 each. The paper to cover each of them was $1.50 each and then the tube of paint I used to recolour them this bronze colour cost $3.99. All up it cost me $22.00 to create these. And all the left overs were used to create a fifth canvas that sits on an easel on top of my TV unit. These are my new cushions. Pretty cool huh? And only $7.95 each! $32.00 for four new cushions! Gotta look out for those bargains! These are the

Fy, Fly Butterfly

Image
I just finished this layout the other night. I've used a variety of techniques here. Firstly I did some digi scrap on the photo. I converted it to a painting and then added the poem directly on the photo. Then I used ink pads to colour the chipboard elements. I then painted glitter paint over the top of the ink and then I used stickers to decorate the rest of the page. I love these stickers. As they're so cheap I'll often buy a packet when I have a spare $2. I put one of the stickers (butterfly one) onto a piece of clear plastic off the kids christmas present packaging and then coloured it in with pens. I then attached the butterfly to the layout using a jewelled brad. The cost of this layout: 3 sheets of stickers ($2 each) but only used a small portion of each sheet, less than a fifth. Then one sheet of paper. Free chipboard elements and a jewelled brad ($0.10). So around $2.00 for the whole layout.

Disney Princess Bedroom

Image
Bedroom Decorating Secrets Revealed Here! And here is my daughters redecorated bedroom. The walls are a roll that I purchased on the weekend for $20. (Big W stocks these in the party section and they're produced by disney). The worst part was that the rolls are a plastic and it was VERY HOT when we were putting it up.... lots of sweating was endured let me tell you... Mostly by DH (as I don't feel the heat as bad as him)! So I have treated her bed and wardrobe and duchess as "Off the page projects" to make them that bit more special. I had ALOT of fun doing this room. Under the bed is a little cubby house feel now with the curtains I added. The curtains are a set I've owned for 15 years and all I did was dye them (the dye didn't take to well though, so they only have a hint of pink to them... which is probably good as there is so pink in there already) and cut them down to size. I'm going to attach some of those little scrapbooking butterflies to the curt

My latest scrap space

Image
As I mentioned I have redone my scrapspace. Here's a photo of what it looks like now. I placed a giant styrofoam block behind the desk to hold the draws, ribbons, stamps and ink pads as I use these things alot and I like having them within easy reach. Plus the ribbons are decorative when displayed this way. I also like that I was able to find another use for all that styrofoam rather than throwing it away. I think this temporary shelving unit is the best buy I've ever made. It cost me around $20 when I purchased it 6 years ago... so I'm not sure if it was $19.99 or $29.99... Anyway I've used it next to the change table to hold all the stuff for nappy changes and then in the laundry to keep all the washing powders and liquids and stuff away from the kids and now it's doing a great job in my scrap space. As we don't own this house we're not able to install permanent shelves and things so this works great.

Canvas Photo Prints

Image
As promised here is a photo showing you what my Christmas Present looks like. These photos were printed on canvas paper and then stretched over the frames. They look fabulous above the dinning room table. Everyone who comes over comments on them.

Jordans 6th B'day Party

Image
Here are some more pages I did with a free digit kit from Shabby Princess ( www.shabbyprincess.com ). These photos are of my son's 6th Birthday which was held at a park and the highlight of the event was riding Pop's Steam Train. I now do my scrapbooking in three categories. There's the digi scrap of individual photos for creative sake when I don't have time to get out all my supplies. Then the traditional scrapbooking I do which allows me to use all of my creativity and then I do some dig scrap pages of the highlights of the year so I can print these as a little book of their own. I printed one of these books and gave it to the kids grandfather for Christmas so he had an album of the kids entire year of growth and adventure. These birthday photo layouts are going into the digi album. They're quick and easy to do and allow me to fit alot of photos in as I can easily resize and crop the photos. Well I'd better go hang my washing out as we've finally got a

Flowers are Beautiful Layout

Image
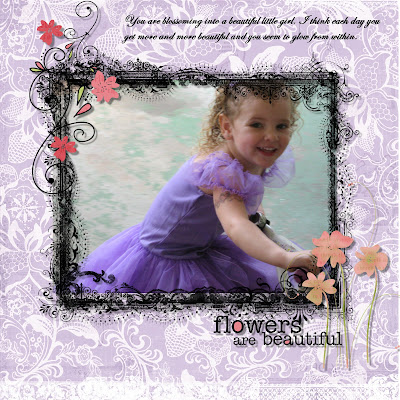
Here's another layout I just finished. This one is done using Rhonaa Farrer Designs from the 2 Peas Range. I love this photo. It's just my DD riding around our carport on her bicycle but her smile and the way the painted concrete has mottled into such a nice background. The gorgeous dress was purchased as her Summer/Christmas Party Dress and got ALOT of use over Christmas. It was one of those dresses that as soon as I saw it I knew she'd LOVE! DD loves purple!!!! I've been very busy around the house at the moment as my DH has been helping me relocate some furniture around the house. We've moved the computer desk into my daughter's room. To make this happen we had to re-organise the furniture in my daughters room and so we took the opportunity to do a little redecorating. We put up some temporary wallpaper so now her room looks like a princess's palace from a disney cartoon. Of course all of this effort is really for my benefit as I never got a little girl&#

Jordan @ 6

Image
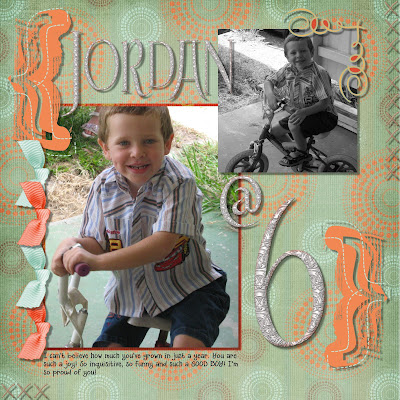
I love these kits from Shabby Princess! I used this one alot today firstly for this photo and then for the birthday party pictures from Jordan's Birthday. It takes so little time to complete a layout using these beautifully co-ordinated kits. Because of that it allows me to get my "fix" for scrapbooking when I don't really have time. These free digital kits are a great way to save on your scrapbooking. The only cost I have is the cost of printing the page. The papers and elements are able to be used over and over again!

Recycle all that packaging!

I know I spoke about this last christmas so I hope you all remembered to go through the packaging from all the gifts and cull out the supplies you could use. This form of recycling is good for the environment as well as your scrapbooking budget. The backgrounds of the boxes are often really pretty. You can either use these supplies on your off the page projects or add a layer of acetate between them and your photos as they are not acid free. Also all of those plastic windows that hold the toys in can be used on your layouts as free acetate. Just add a stamped image to them and then lay then over your layouts. I even thought the plastic that was used to hold the many, MANY ties on the back of the boxes was great to use as a ribbon slide. You could also cut out all of the names of the toys and instead of making titles for each photo of the gifts the kids got just place the cutout from the box on each photo. Of if you forgot to take a photo of each gift you could just do a page of labels

Happy Holidays - A Christmas Layout

Image
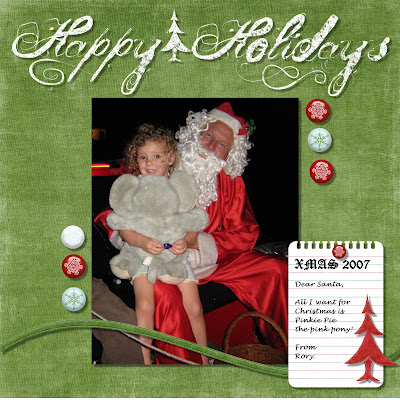
I haven't had much time to post lately. It's school holidays here so I'm trying to keep the kids occupied.... which is somewhat hampered by all the rain we've had since Christmas. Now this is a really sticky topic around here as we're in such desperate need of the rain that none of us mums are game to wish out loud for a sunny day but we're all secretly crossing our fingers. Anyway with all the visiting of friends and going to the movies etc I haven't been home much to do any scrapbooking let alone blog. I have burnt the midnight oil a couple of times though to complete a present for my girlfriend for her birthday. (A folder to store report cards and class photos for own every year of school from pre-school to grade 7 AND another box of handmade cards). Consequently I'm getting a little antsy to get to some of my own projects... So this evening I did some digi scrap to help get me by. This layout took aroud 15 minutes to complete and the kit I used was