Posts

Showing posts from 2008

Creating my own Stamp Look

Image
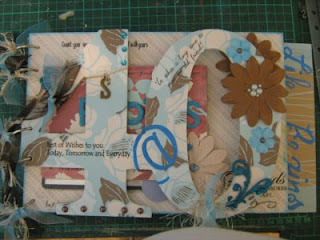
Here is one idea I came up with, it was to create my own stamps journalingsquare. I downloaded a design off of the internet and then used a white pento trace it onto some velum. I then just cut it out and used it as a pageaccent. This LO itself was not cheap as I bought things for it as it was agift for my cousin, but this could be used with other ideas to create ainexpensive look. However, this is the LO I got the stickers for, which Iused for your baby card (as the scrapmiser said in one of her earlier postsbefore baby, use up your scraps on cards). Thanks for looking, Regards, Anne

Make Your Own Stickers with Avery Labels

Image
Here is a really simple Idea I had using clear laser labels made by Avery.I have discovered they are GREAT for creating your own style of title and for doing journaling. This is a really simple LO where I have used a DCWVPP and then some plain cardstock, but then cut a 'splash' shape out of thePP and then printed up a title on the Laser Labels. I found a font onlinewhich emphasises the water feel. Hope you like it. Laser Labels are NOT cheap when you first buy them, but if you only make what you are going to use, rather than when you buy stickers you tend to WASTE a lot of them like left over letters, or some of the set which you don't use, where as printing your own means you only make what you are going to use, making it cheap in the end. Regards, Anne

Ella's First Santa Photo

Image
Here's our first Santa Photo! Can't wait to scrapbook this!

Subscribe to Save!

A non-layout related idea I have for saving money when scrapbooking is if you subscribe to a magazine, I have waited until they are having an offer,for example, Creating Keepsakes often has subscribe now and receive $99worth of free Keiser Craft products for free. I always wait until they are having this offer and subscribe then. This way you are getting your magazine, which to tell you the truth I probably would have spent the $90 onanyway over the 12 months, and I get the paper or bling or whatever they aresending you this time for free. I am not quite as good at being a meiser as the Scrapmeiser, but I do a few things to save some money. By Anne AKA: the sister-in-law

Li'L Monsters - Felt Accents By Anne

Image
Li'L Monsters - Felt Accents. This is a LO I did as a 'Jack' of another artists, Nikala O'Brien which wasa challenge through Scrapbook city (my LSS), however the embellishments here is what I want to talk about. Felt is quite an inexpensive way of adding texture and you can make some GREAT little embellishments. Felt accents can cost a LOT of money, But by making them yourself you have a UNIQUE embellishment at a fraction of the cost. Many of the discount and variety stores sell A4 size pieces of felt for as low as 40cents each. Here I have stitched some monsters, based on some cute little monster pictures I found on the internet, but if you can't sew then you can always cut out the pieces, just like paper piecing, and use a fabric pen to draw on some of the details, rather than stitching. They are cute and then the only other pieces I have used is some lettering and some paper. The lettering is mixed as well as I like to try and use as much of my lettering as possi

Scrapbook a digital photo frame

Image
For my cousin and his wife I bought them each a digital photo frame for Christmas for their desk at work and because I always try to "put the love" into my presents for them to try and show them how much I love and appreciate them I decided to decorate the frames with my scrapbook supplies. I have used rub-ons, stickers and kaiser jewels and bella chipboard (glitter self sticking) to great effect. This took a $60.00 expenditure to around $70.00 for two gifts filled with LOVE! Not too bad! Especially as I managed to get them done while Ella was napping yesterday.

Baby Ella Birth Notice

Image
Hi everyone, well here's the details of the arrival of my latest bundle of joy. She's a gem of a baby. Sleeping and eating well. She even manages to nap all day with her big brother and big sister pawing her and patting her. I won't be making regular posts for a little while as I'm getting the hang of her routine and napping as much as possible. But my sister-in-law Anne has generously offered her services so you won't be missing out on posts over the next couple of seeks. . I think you'll enjoy the different perspective too as she's a fantastic crafter with embroidery and sewing as her extra skills so you'll definitely get some new ideas. Allow me to present Anne.... AKA: the sister-in-law.... LOL! Hope you enjoy her unique perspective and ideas as much as I do. I also think you'll enjoy her different scrapping style: Hi I'm Anne Patterson I am the mother of two beautiful boys and have been scrapping for about four years, but it has only been in

free digital scrapbooking kits and stuff!

The MRS sent me this link to checkout of free digital supplies I thought I'd share with those of you interested. So if you're thinking of trying some digital or are already playing with it you might find some stuff to your liking here....... http://digifree.blogspot.com/2008/07/digital-scrapbook-freebies-26-jul-la.html I did! LOL! Thanks TheMrs

Using up your scraps making cards

Image
This card was really fast and easy to do. I made it for the teacher my DD will be getting next year when she starts prep (preschool). It was his birthday this week also. So I wanted to surprise him. He's such a fantastic teacher (DS had him when he did preschool) and I fought so long and hard to get him. I know DD will do really well with him and I think she will find the transition to being a big sister easier with some familiarities and expectations fulfilled (she thought she was starting school at the beginning of last year 2007 in his class, so it's been a long wait for her). Anyway all I did was attach a piece of patterned paper from the DCWV glitter stack range (left overs from previous projects.... see Friends layout) and then cut a square of foil cardstock larger than my stamped image and attached these using pop dots.... Pop dots are perfect for cards. They allow you to use a very simple design (aka: quick) but make it look good with the main elements popping off the

40th Birthday Present

Image
Here's a present I've been making and dying to show you all but of course couldn't because the surprise party for the recipient was this Sunday past.... so finally here it is. I started with a Kaiser Album kit and then added a small photo album and another small notepad. The album is for all the photos of the day and the notepad gave everyone a place to sign. On the back page I added a clear pocket for holding all the cards and other momento's of the event. I used papers from my stash along with stickers and flowers and rub-ons from my stash so was then able to spend on a few bling stickers (Kaiser) and pearl stickers (also Kaiser) and then some co-ordinating ribbons. But the absolute BEST thing was I was able to finally get the puffy velvet marker! (For those of you who watch TV Weekly online you will of seen this product in action). It's a pen that writes like a normal pen but when you hit it with your heat gun the writing or swirls or stencil or whatever you hav

Using up your scraps layout: Higher Lower

Image
Here's a layout I completed to use up some of my scrap pieces of paper. I keep all my left over pieces of paper in a folder and usually use those scraps for card making and craft activities for the kids. This time I thought I'd use some for another layout and this was the outcome. I've also used my Labeller for the words as it was so quick..... Before a debate begins raging and you all go purist on me: No I don't think these are acid or lignin free. AND I'm not really concerned as none of them touch my photos. PLUS all the photos are stored digitally for easy reprinting. Anyway I used chipboad Letters for my main title monograms and then used my fiskars cutter and template to make the butterfly. Fancy sissors were used to cut the patterned paper into strips to add next to the ribbon and then my creative memories punch to cut out the fancy squares which I used as photo corners. The journalling was done on a piece of paper I stamped with a stamp I purchased for

Teddy Bear Ballerina Paintings

Image
Since I've been sharing the decorating of the nursery with you I thought I should share these cute paintings my DH did to continue the theme. I'm so lucky! I described what I wanted and he just sat down and painted it! How cool is that!