Posts

Showing posts from June, 2011

Using up your Paper

A really great way to ensure you use as much of your paper as possible is to group together layouts of similar colour combinations and try to do as many layouts as possible with the same paper combos. Or id the photos are all of the one topic (i.e a holiday) this is a great way to make a mini book with a common colour scheme to each page... (you may need to get really stingy oops sorry I meant creative to make a few pieces of pattened paper go the distance for a mini book). Once that is done try to do a card and even a matching gift card. Once you have done as many layouts and cards as you can, it's then time to "file" your leftovers. Find a storage system that works for you and store all your unused scraps in it. Grouping together by colour is a good way to use up as much of the scraps as possible. And make it easy to find what you're looking for another time. Whenever you're doing a layout and have picked out your papers it's a good idea to have a little

Ready Set Grow

Image
So while I had the papers out I thought of these photos and thought they'd look great using these really bright papers too..... This is a much cheaper layout than the last though as it's all paper... I used the Cricuit Cartridge Wall Decor and More to cut the title and the plants.  I used a martha stewart border punch as well.

Play

Image
These are some really fun photos so I thought they need a really fun layout. The patterned papers were from a kit at Big W and cost $7.95 for the whole pack. I have alot of this pack left! I used a martha stewart border punch and several kaisercraft flowers and the kaisercraft bling title to create the sense of whimsy. The layout itself is very grungy.... using tearing techniques and inking to give a shabby effect.

Friends Laugh Together

Image
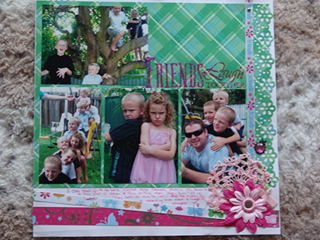
Here's a layout I did using the DCWV butterflies paper stack. I included a bling ladybug, kaisercraft flowers, ribbon and a crochet piece done by my mum. I also used a martha stewart border punch. These photos were a fun day with friends and their kids and I love how the kids are all stacked up the slippery dip..... The middle shot is a classic as it shows our 2nd born children (who were in prep together) pulling their "cranky faces" which they are both REALLY good at pulling!

Family

Image
This photo shoot was done the same day at our friends house and I have used the same paper range and embellishments from that range to create a co-ordinating layout.

joy

Image
My final layout of photos from the same day at our friends house. Again I have used the same papers and elements from that range.... and thickers from the $2 shop. I also stamped a kaisercraft journal spot onto vellum and cut that out . By using papers from the DCWV paper stack range I save alot on the cost of my papers. Usually a piece of pattern paper at my local scrapbook store costs between $1.80 and $2.50 whereas a piece of paper from the paper stacks costs $0.42 cents per page. (Sometimes less when they run a special the price drops to: $0.16cents per page.)

YouTube Great Free Resource

I totally love you tube and all the free video's it brings to my attention. Today, after attending sports day at school, I watched several clips on different products to see if I would like to own them :) I think that if you are wanting to learn a technique or research a tool you definitely can't go past You Tube..... there's also my tutorials and videos up there if you're looking for inspiration. Lol I love that all these free videos are available so if you're not feeeling well enough to scrapbook due to a winter chill (or your scrap space is freezing like mine in the garage lol) maybe you can learn about some scrapbooking techniques or new products instead.

Cute

Image
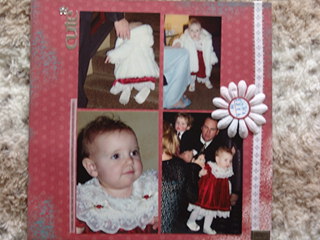
 I did this page using Kaszazz patterned paper and simply added a ribbon and flower and the metal word "Cute".  It was a really quick layout as I really needed to get these photos scrapped. This wedding was 5 years ago now (my husband's 1st sister's wedding) and it's about time I got these in an album. Using simple linear lines and one piece of paper keeps the design clean and simple. By using minimal embellishments and elements it really keeps the costs  down.

Best Friends you & me

Image
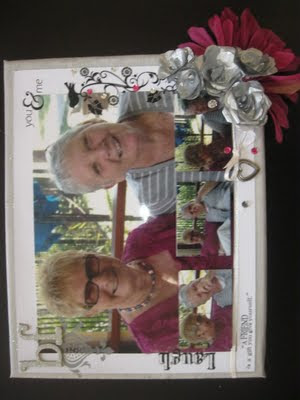
Here is the second canvas I did for my best friends mum and her best friend. (sorry it's sideways, something went wrong in the uploading and it wouldn't upload the right way round). On this canvas I used the same elements and photos (more smaller photos) and of course more handmade photos, but this time I wanted it to look really different so they could choose the one they liked best.  I used the silver and pale background here as it makes the lady in grey fade into the background and the lady in pink really stand out (so the lady in grey really liked this layout best)..... and if you look at the other layout I did the opposite, making the lady in pink fade into the background and of course she chose that one as her favourite.

Together

Image
Here's a layout from way back! 18 years ago to be exact! LOL. This is a photo of my birthday and DH and I had been dating only a few weeks. I did this layout using a TLC kit which was given to me. I stamped and sewed hearts onto the layout and used pop dots on the "I luv you" part.  I was especially pleased to find the heart ribbon to keep with the theme.

Lil Chef Birthday Party.

Image
Last Weekend I did a fabulous birthday party for my second child DD1. She had a little chef party. We made aprons and chef's hats for all the girls as well as recipe books and show bags. Each child got a little rolling pin, cheese grater, whisk and wooden spatula (of course I decorated everything to match my theme). I also made two little boxes. One for their cupcake and one for their cookie. (I used McDonald's nugget box and cafe takeaway boxes as templates). I used a cupcake theme for the party because of some great cupcake stamps I had and used the kaiser cupcake mini album as a template to make my recipe books. My cricuit came in very handy! The kids made their own food for the party too which meant less work for me in the kitchen. They cut out a cookie from cookie dough and decorated this cookie and a cupcake using lollies and icing and decorations and they made a mini pizza each. The room was decorated using paper lanterns (these are very cheap at the discount stores)

Another Scrapbooking Show has been and gone

Well this past long weekend another scrapbooking show was in town and I frankly couldn't rustle the enthusiasm to go. My best scrapbuddy wanted to go but it really didn't interest me.  I had my aunties here visiting from Tasmania and really wanted to spend as much time as possible with them but apart from that I've gone right off the concept. Let's see you get charged an entry fee for the right to go shopping?  In past years the specials haven't been so amazing as to get me excited.... then there's the expensive parking (public transport to our home town sucks... it'd be a train and then a bus and frankly at the end of a day at the show you just want to get home as quickly as possible), then there's the expensive food...... So I haven't been to a show in a while. I might get motivated for the next one though???? I do think though if you are going to any of the shows it's a good idea to check out the free classes and demonstrations online

60th Bday Present

Image
This is a canvas I did as a present for my Best Friends' Mum.  She is such a wonderful lady and has been so great to me since my mum died I wanted to do something special for her.  This is the first of two canvases I did. One for her and one for her best friend. When doing a canvas I like to paint my canvas first and then use papers to accent my photo. I like to keep canvases really simple. Here I used one piece of cardstock with a martha stewart border punch and then some hearts and more of those handmade flowers I've been doing to add some colour to the layout.  I didn't have a punch or cartridge for my cricuit to cut the scalloped hearts so instead used a card I had received from a friend as a template to draw around and then hand cut the hearts. I also added one large flower folded in half behind all my handmade blooms to give more ruffle to the layout. When doing a canvas I like to do one photo and have the photo much larger proportionately than I would on a scrapb

Happy Birthday 2

Image
Another blast from the past. This phot was taken on DS1's 2nd Birthday on his new bike his Uncle David and Aunty Nicky got him.  He was so tickled with this! So was daddy.... he didn't have to put it together LOL. I saved on this layout by using cut outs from his birthday card to embellish the page. I also used plain papers and embossed them or cut them with scalloped scissors to make them more interesting. I only used the one patterned paper which I got in the "specials" section of the scrapbook store and only paid $0.90c for. I made tthe other paper elements on the page which saved me quite a bit.

Family (2)

Image
Here's another layout I called family... LOL   Need some new title ideas huh? So this layout uses one patterned paper from kaszazz and some flowers and thickers.... not alot of elements. By using a patterned paper for my background I am able to do the layout quickly and get through alot more photos. I also used some stickles here to decorate the area around the flowers (swirls) and a vellum quote. This is a very old photo now. DS1 is now 9 turning 10 this year. (In this photo he's 3yrs old). And DD1 was 1 year old in this shot. (She's now about to turn 7).